Week 2: Watson Discovery
See the [[Main AI Page]] and the [[Ideas for Newsrooms (LIST)]]
Main takeaways from week 2 of the course.
Lab 2: Creating a Discovery Collection
Objective for Exercise:
- How to create a Watson Discovery Service
- How to upload Documents to a new Discovery collection.
Since you're taking this course you should already be familiar with Watson Assistant. What you might not be familiar with is Watson Discovery. In Lab 1 you created a service instance in your IBM Cloud account (if you haven't, go back and consider doing that now); here we'll create a Discovery Collection and, in the process, learn more about this powerful insight tool.
Explore the default News Collection
We'll start off by launching the Discovery tool and exploring the default News collection.
1. From your Dashboard, click on the Discovery service you created in Lab (Click on the name, not the icon next to it.)
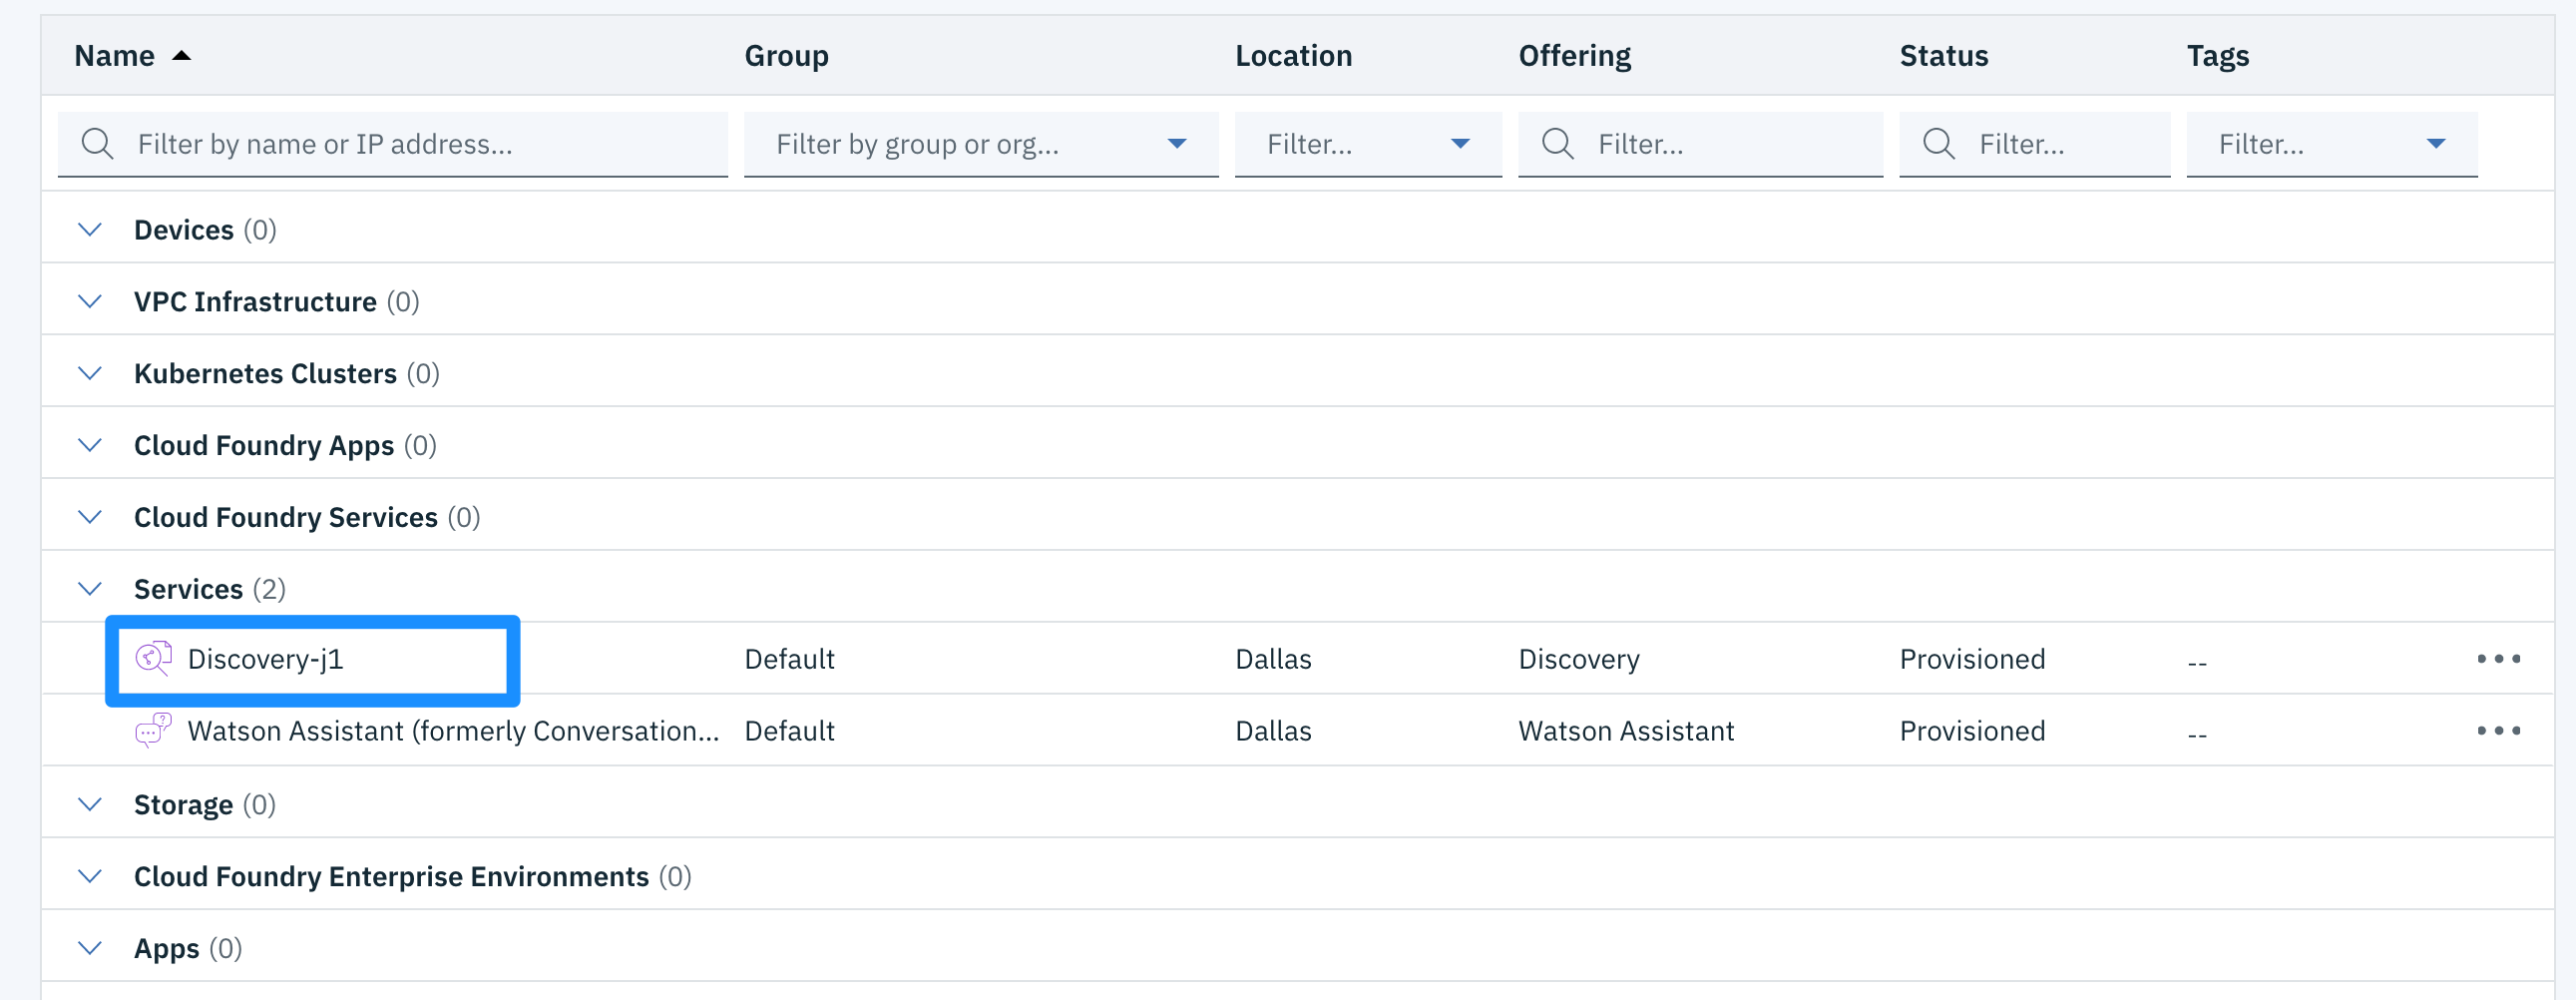
- A new page will appear. Click on Launch Watson Discovery. You should see the Manage Data section of the tool.

3. You'll notice that by default the Watson Discovery News collection has been pre-loaded for you. The Upload your own data and Connect a data source buttons allow you to work with your own data. For the time being, let's explore the News data collection. Go head and click on the **Watson Discovery News** tile.
- You should see statistical details about the collection, similarly to the image below.
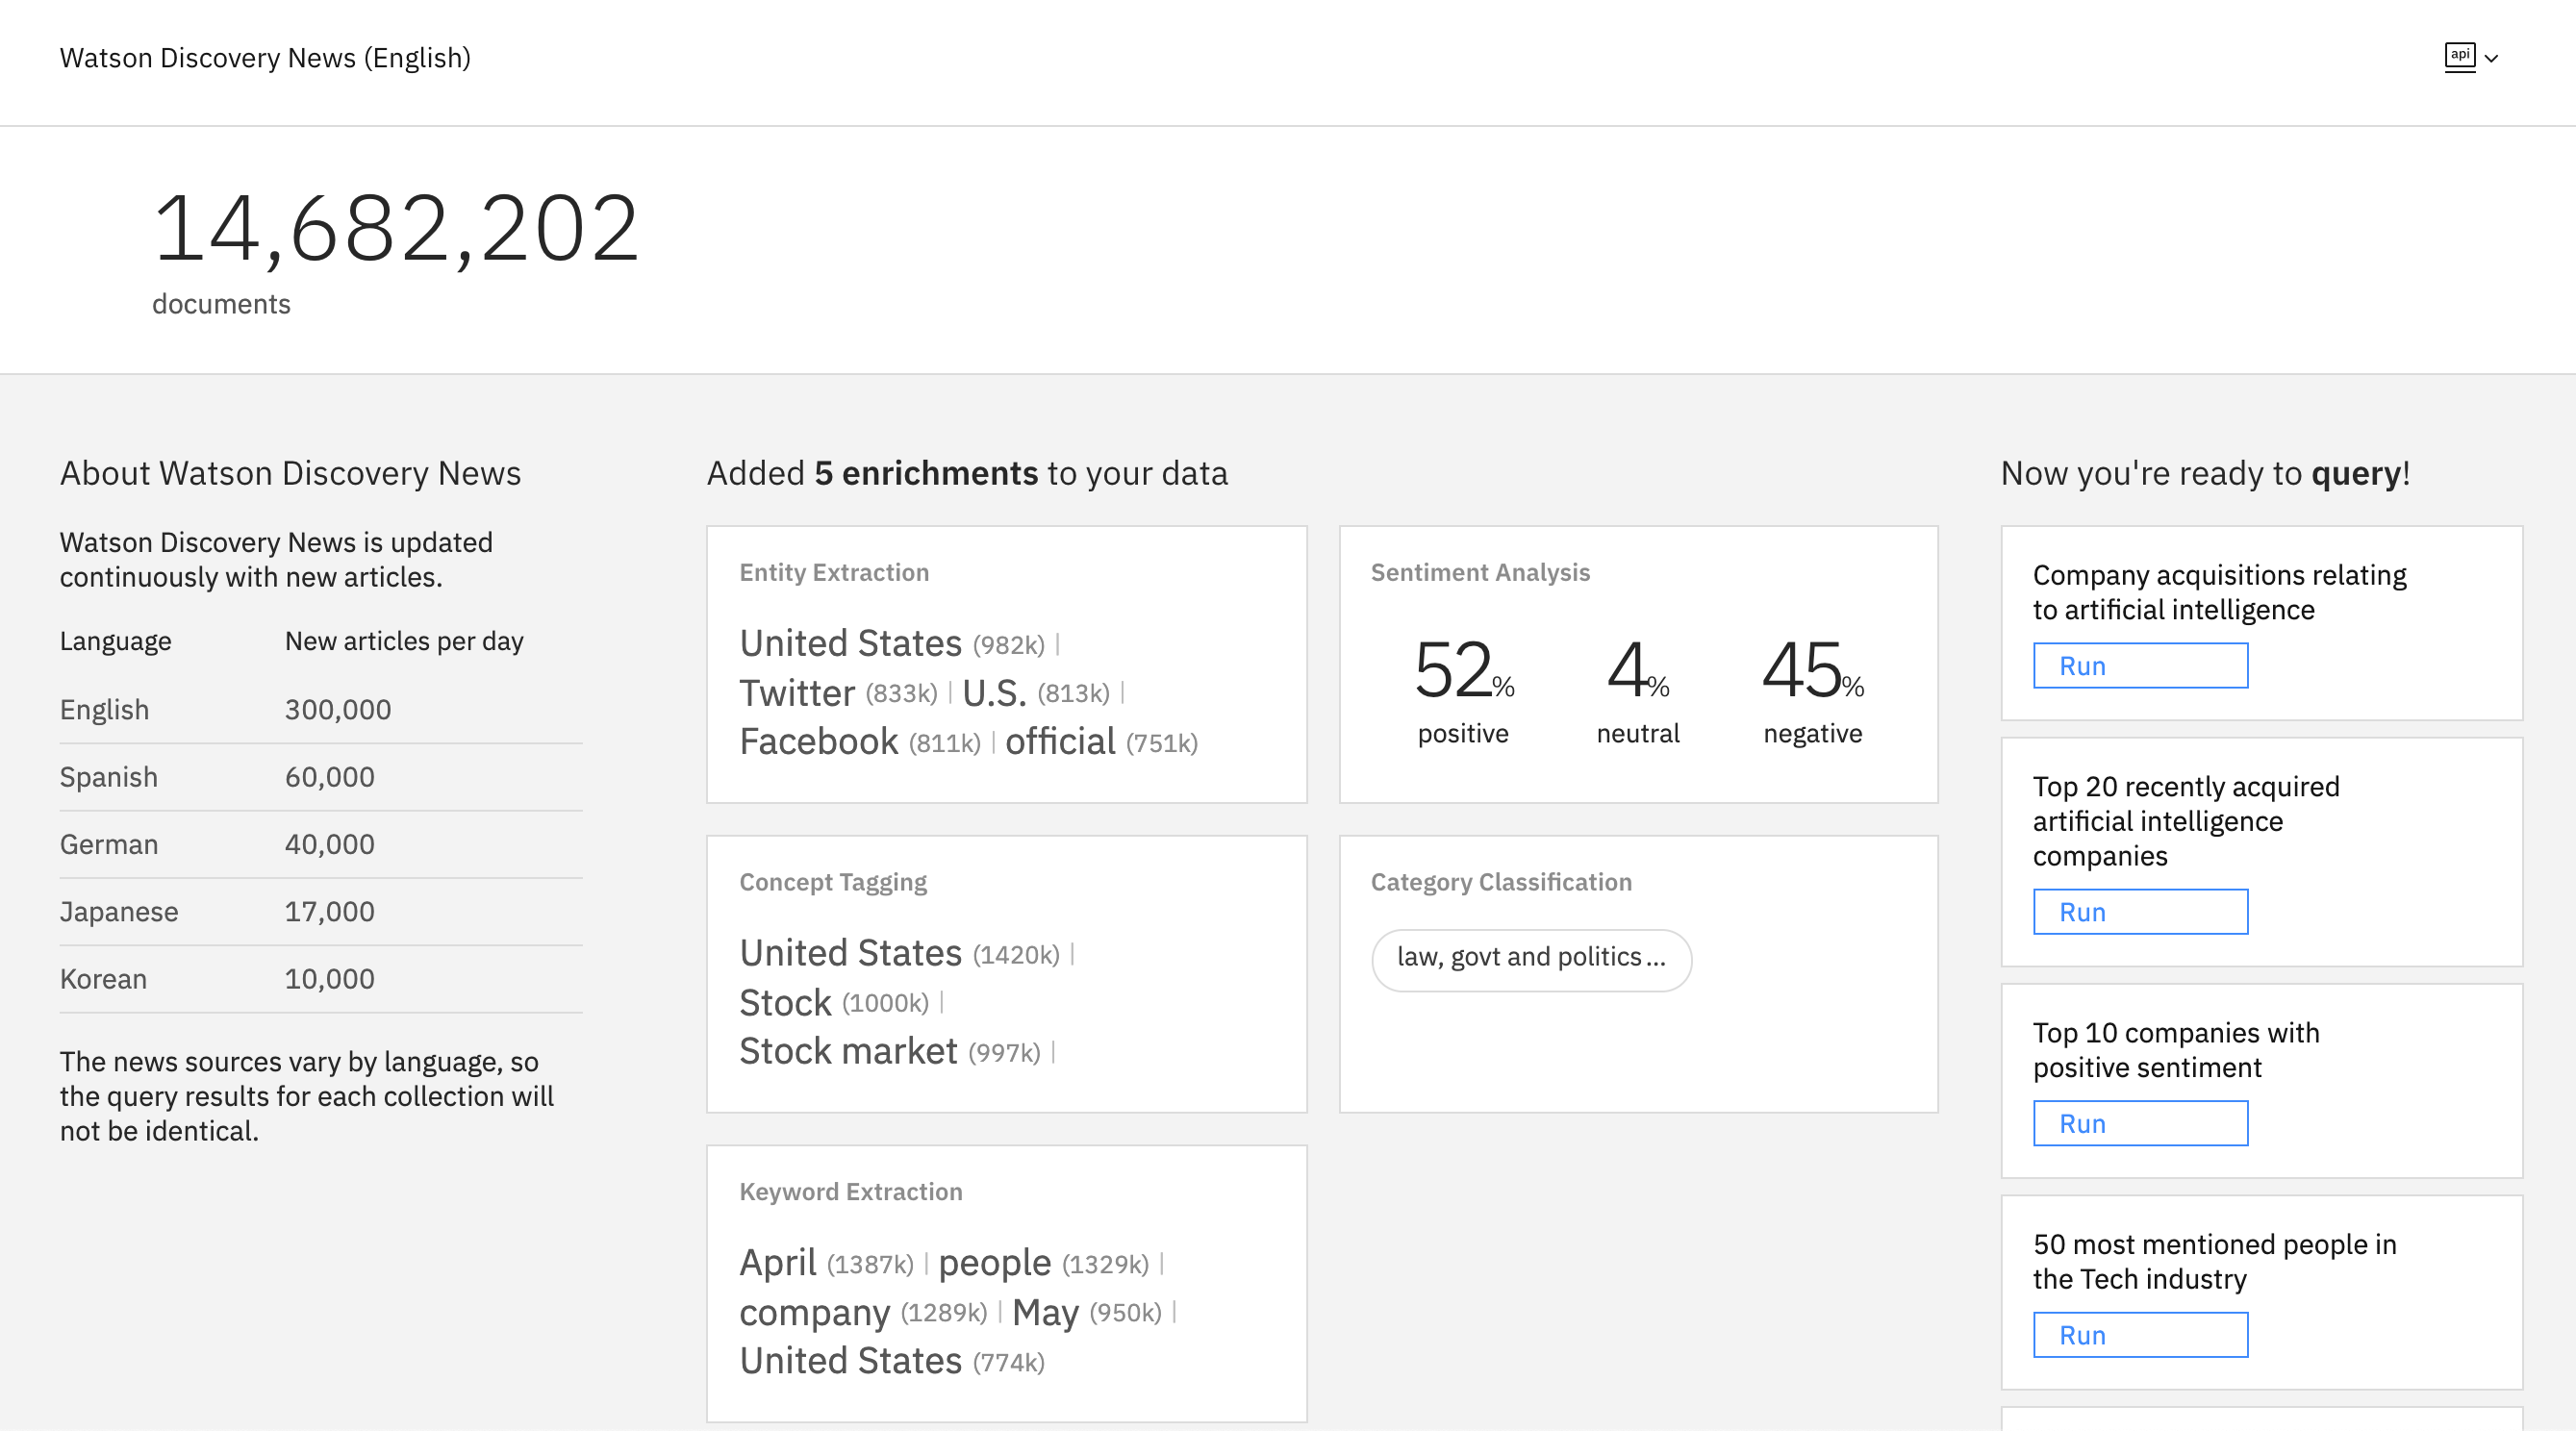
- Select one of the pre-made queries on the right and click Run. Any query of your choice will do. You should see a result somewhat similar to the one shown in figure (only the query might be a different one, depending on which one you selected).
You'll notice that the third icon on the left (the magnifying glass icon) is now selected, since we are no longer within Manage Data but rather in the Query section.
If you click + Search for documents, you'll also notice that there are three ways to query data: 1) Using natural language; 2) Using the Discovery Query Language, which is what the pre-made queries use; 3) Using visual mode.
We won't be spending much time learning the intricacies of the Discovery Query Language, since our chatbot will simply pass the natural language queries from the use to the Discovery service to retrieve relevant articles ranked in order of relevancy. However, feel free to spend some time analyzing these sample queries which use the Discovery Language, as well as reading the [relevant documentation](https://cloud.ibm.com/docs/discovery?topic=discovery-query-reference&cm_mmc=Email_Newsletter-_-Developer_Ed%2BTech-_-WW_WW-_-SkillsNetwork-Courses-IBMDeveloperSkillsNetwork-CB0106EN-SkillsNetwork-20719128&cm_mmca1=000026UJ&cm_mmca2=10006555&cm_mmca3=M12345678&cvosrc=email.Newsletter.M12345678&cvo_campaign=000026UJ&cm_mmc=Email_Newsletter-_-Developer_Ed%2BTech-_-WW_WW-_-SkillsNetwork-Courses-IBMDeveloperSkillsNetwork-CB0106EN-SkillsNetwork-20719128&cm_mmca1=000026UJ&cm_mmca2=10006555&cm_mmca3=M12345678&cvosrc=email.Newsletter.M12345678&cvo_campaign=000026UJ.
On the right of the page, you'll see the output of the query over two tabs: A human-readable Summary tab, and a JSON output tab(which you would work with when querying the service through its API).
Expanding the relevant documents returned by the query, will highlight how they are relevant to the query. For example, in my screenshot above, you'll notice that the query is asking for AI acquisitions in the news, so the top result (among 104 matching document) is one that features the word acquire in the title, URL, and text fields. Watson uses its AI capabilities to enrich the raw documents that are uploaded in Discovery. So much of the magic lies in its ability to classify and tag the documents so that they are easy to query. In this case, my top result for this query, has a positive sentiment, and was deemed as relevant to the concept of Artificial Intelligence by Watson.
Feel free to explore a bit more on your own, perhaps altering the query yourself or by trying a natural language query. When you're ready, move on to the next section where we'll create a collection of our own, which is much more relevant to the chatbot that we'll build.
Create a Coursera course catalog collection
In the next module, we'll create a barebone student advisor chatbot for Coursera. It should be able to, among other functions, point people to courses relevant to the topic the user is looking for. So when the user asks, "Do you have courses on Python?" the chatbot should be able to reply with a list of courses.
The problem with the traditional approach of hardcoding courses in the node responses within Watson Assistant is that Coursera has thousands of courses. It's just not feasible to manually add all of them to a dialog.
So, instead, we'll leverage Discovery and connect it to Watson Assistant. But before we can do all that, we'll need to have a Coursera course collection uploaded within Discovery. Let's do that now.
Two ways to upload data
There are two main ways to upload data to Discovery: uploading documents and connecting to a data source. If you head over to the Manage Data section of your Discovery instance, you'll see the two corresponding buttons.

In case you're curious about which data sources are available, you can click on that second button and you see a list of services similar to the one below:

The most relevant source here would be Web Crawl, which allows us to specify a URL and the collection will store each page connected to that URL as a document. You can even specify how deep the crawler should go (e.g., how many links it should follow before stopping).
For the sake of showing how to import documents, and to spare Coursera's servers from thousands of people all crawling their course catalog, I prepared a collection of 500 courses of theirs. The reason why I limited it is that your Lite free account is limited to 1000 documents a month, and you'll need more documents for a second collection during your project in Module 6.
Let's see how to upload them.
Upload Coursera course documents
- Download the following zip file containing a list of courses as JSON files and unzip it.
-
From the Manage Data section of your Discovery instance, select Upload your own data. You'll be asked to give a name to your collection. Call it Coursera Courses or something similar and click Create.
-
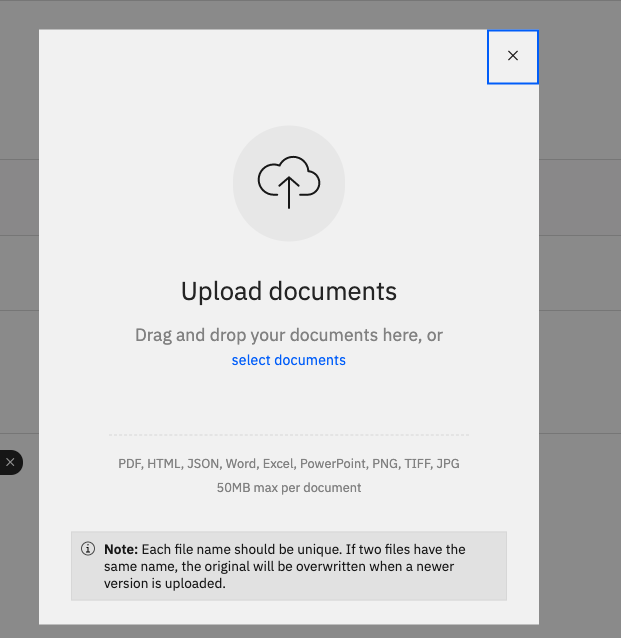
You'll be prompted to upload documents. Click on the upload icon and add the files you extracted. You can use CMD+a or CTRL+a to select all of them at once in the upload dialog. Alternatively, you can simply drag and drop the files on the page.
-
Processing the data will take a few minutes. Let's use this time to investigate the structure of the documents we are uploading (but feel free to take a coffee break as well, if you need it). :) If you see Errors and warnings during the process, simply ignore the them. It gives a warning because the course document contains a reserved field of id.
    {
      "courseType":"v2.ondemand",
      "description":"Gamification is the application of game elements and digital game design techniques to non-game problems, such as business and social impact challenges. This course will teach you the mechanisms of gamification, why it has such tremendous potential, and how to use it effectively. For additional information on the concepts described in the course, you can purchase Professor Werbach's book For the Win: How Game Thinking Can Revolutionize Your Business in print or ebook format in several languages.",
      "id":"69Bku0KoEeWZtA4u62x6lQ",
      "slug":"gamification",
      "instructorIds":[
         "226710"
      ],
      "specializations":[

      ],
      "partnerIds":[
         "6"
      ],
      "name":"Gamification"
    }
The most important fields for us are name, slug, and description. Name is the title of the course, slug the path to the course that we'll append to https://www.coursera.org/learn/ to generate the course URL, and description gives Watson Discovery enough info to determine the relevance of the user query to the course content.
Remember, Discovery is only as good as the data you feed it.
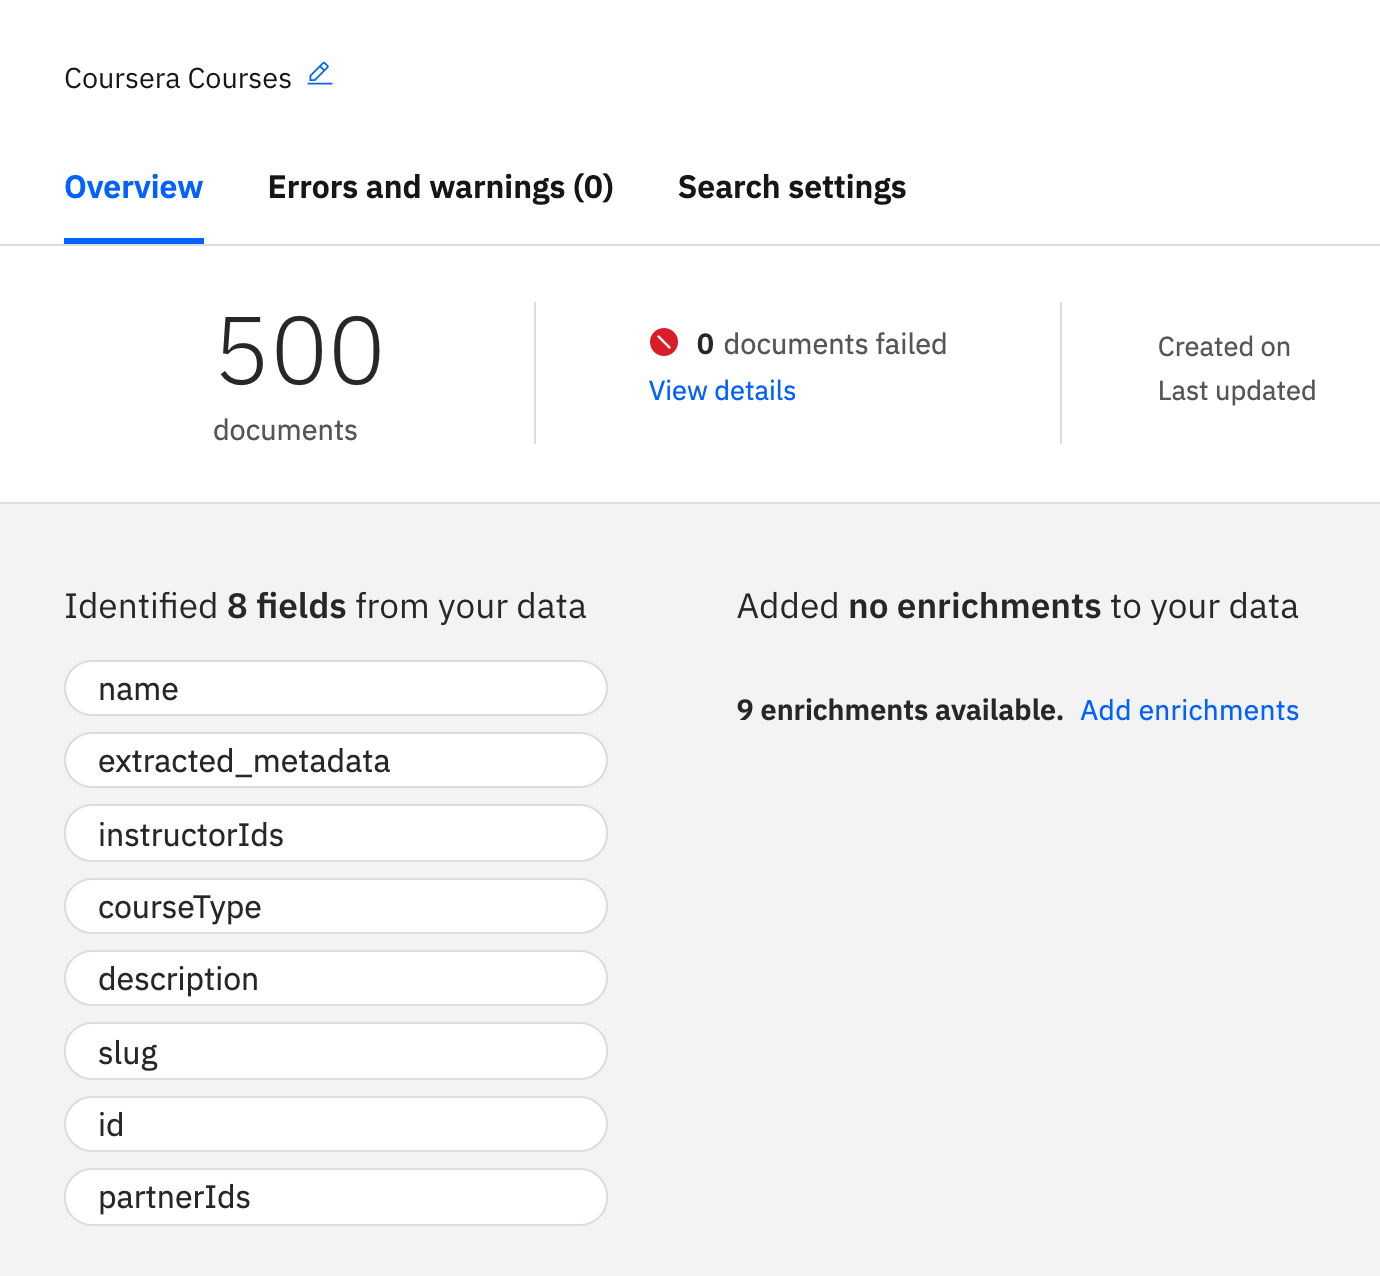
- Once the import is completed, you should see something similar to the image below. The number of imported documents is reported, as well as the fields that were identified by Watson. Name, slug, and description were identified correctly, so we are good as far as we are concerned. (Don't worry if you see a warning about the data containing an id. It just means that Discovery has already a protected id field, so the one we uploaded in our JSON will be ignored.)

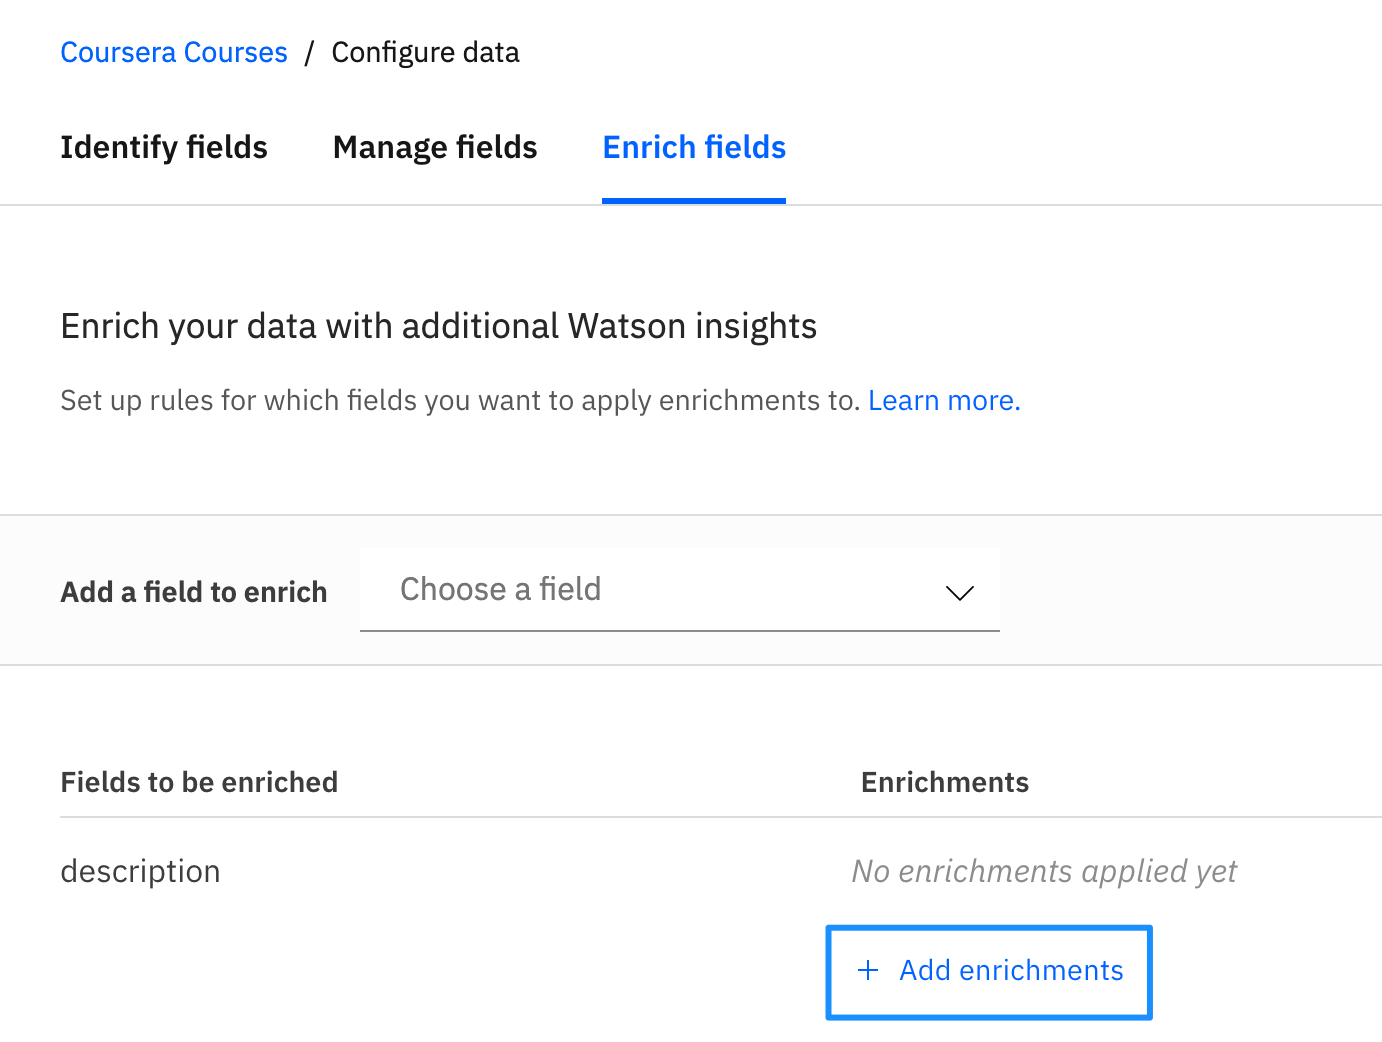
You'll notice how there are several enrichments available. Click on Add enrichments.
- Enrichments tell Watson what kind of analysis we want to run on the data we uploaded, and then store that information as metadata attached to our raw content. Select description as the field to enrich, and then click on + Add enrichments as shown in figure.
-
You'll see a series of possible enrichments, including keyword extraction, sentiment analysis, concept tagging, and more. Spend some time familiarizing yourself with what these enrichments do by clicking on the Learn more under each enrichment.
-
Once you have a general understanding of what these enrichments do, click the Add button for the Keyword Extraction and Concept Tagging enrichments.
-
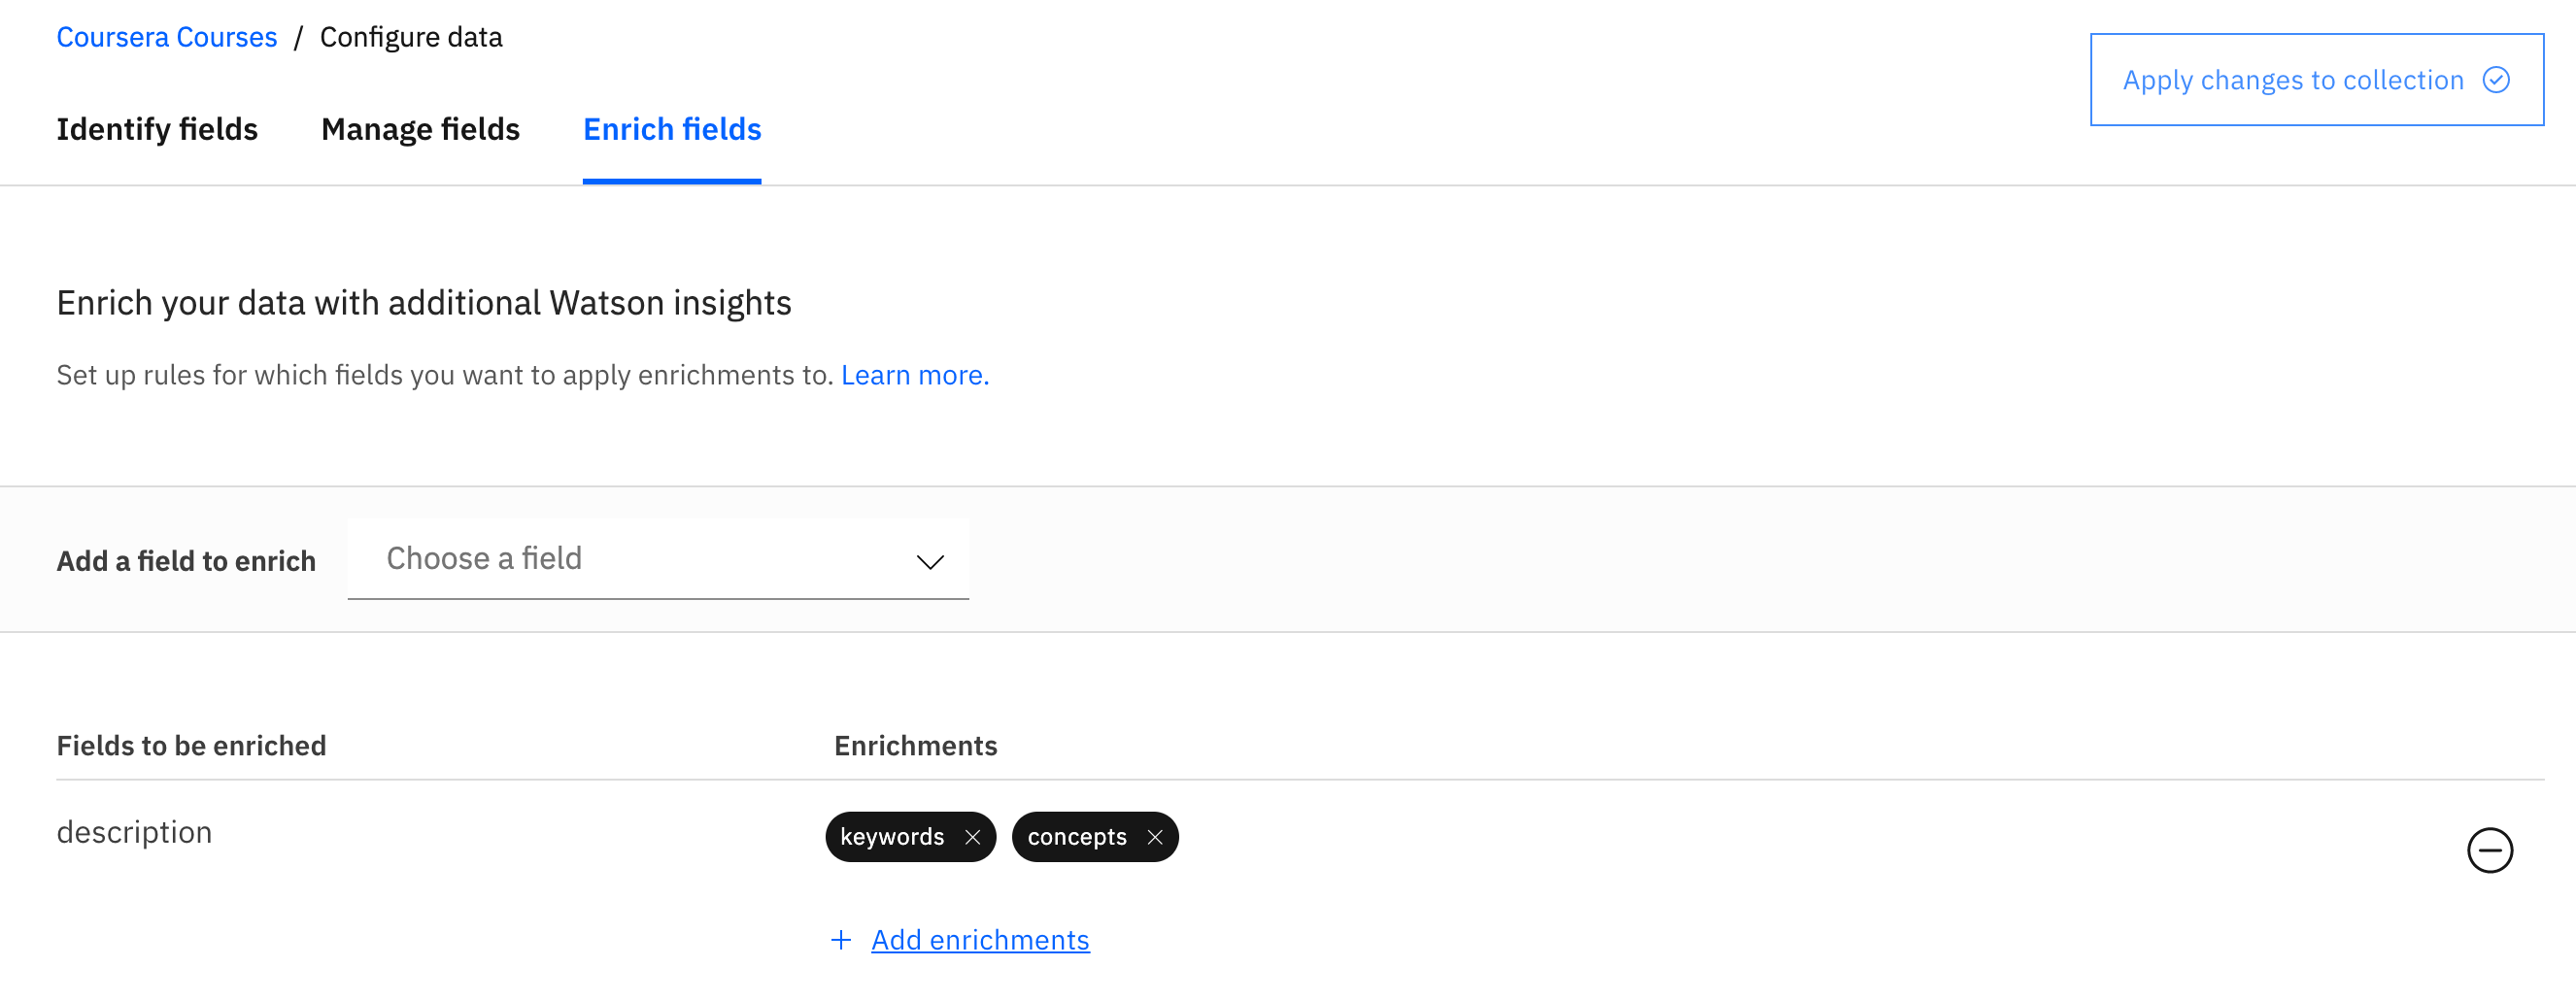
Once done, close the Add enrichments window to return to the main screen, as shown below.
By the way, aside from enriching fields, you can also identify/map fields to the data if the document you uploaded was unstructured. In our case, we used JSON which is already structured, so the Identify fields tab is not useful to us here.
The Manage fields tab allows us to turn off fields that we don't want indexed. This is more important when you have lots of irrelevant fields. In our case, we can leave all fields on by default or feel free to turn off some as an exercise, but preserve name, slug, and description.
When you're done exploring the data configuration section, click on Apply changes to collection.
If you get this popped up, simply close it by clicking x top right.
Please navigate to Overview tab of Coursera Courses collection to check whether enrichments are properly added to the collection. If you see Added no enrichments to your data, please upload the 500 documents again. Re-uploading the duplicate documents will simply add enrichments.
This screenshot below is an example of missing enrichments in the data.
It should show added 2 enrichments to your data like below screenshot.

-
At this point we are all set. As a sanity test, click on the query icon on the very left and then click on Search for documents.
-
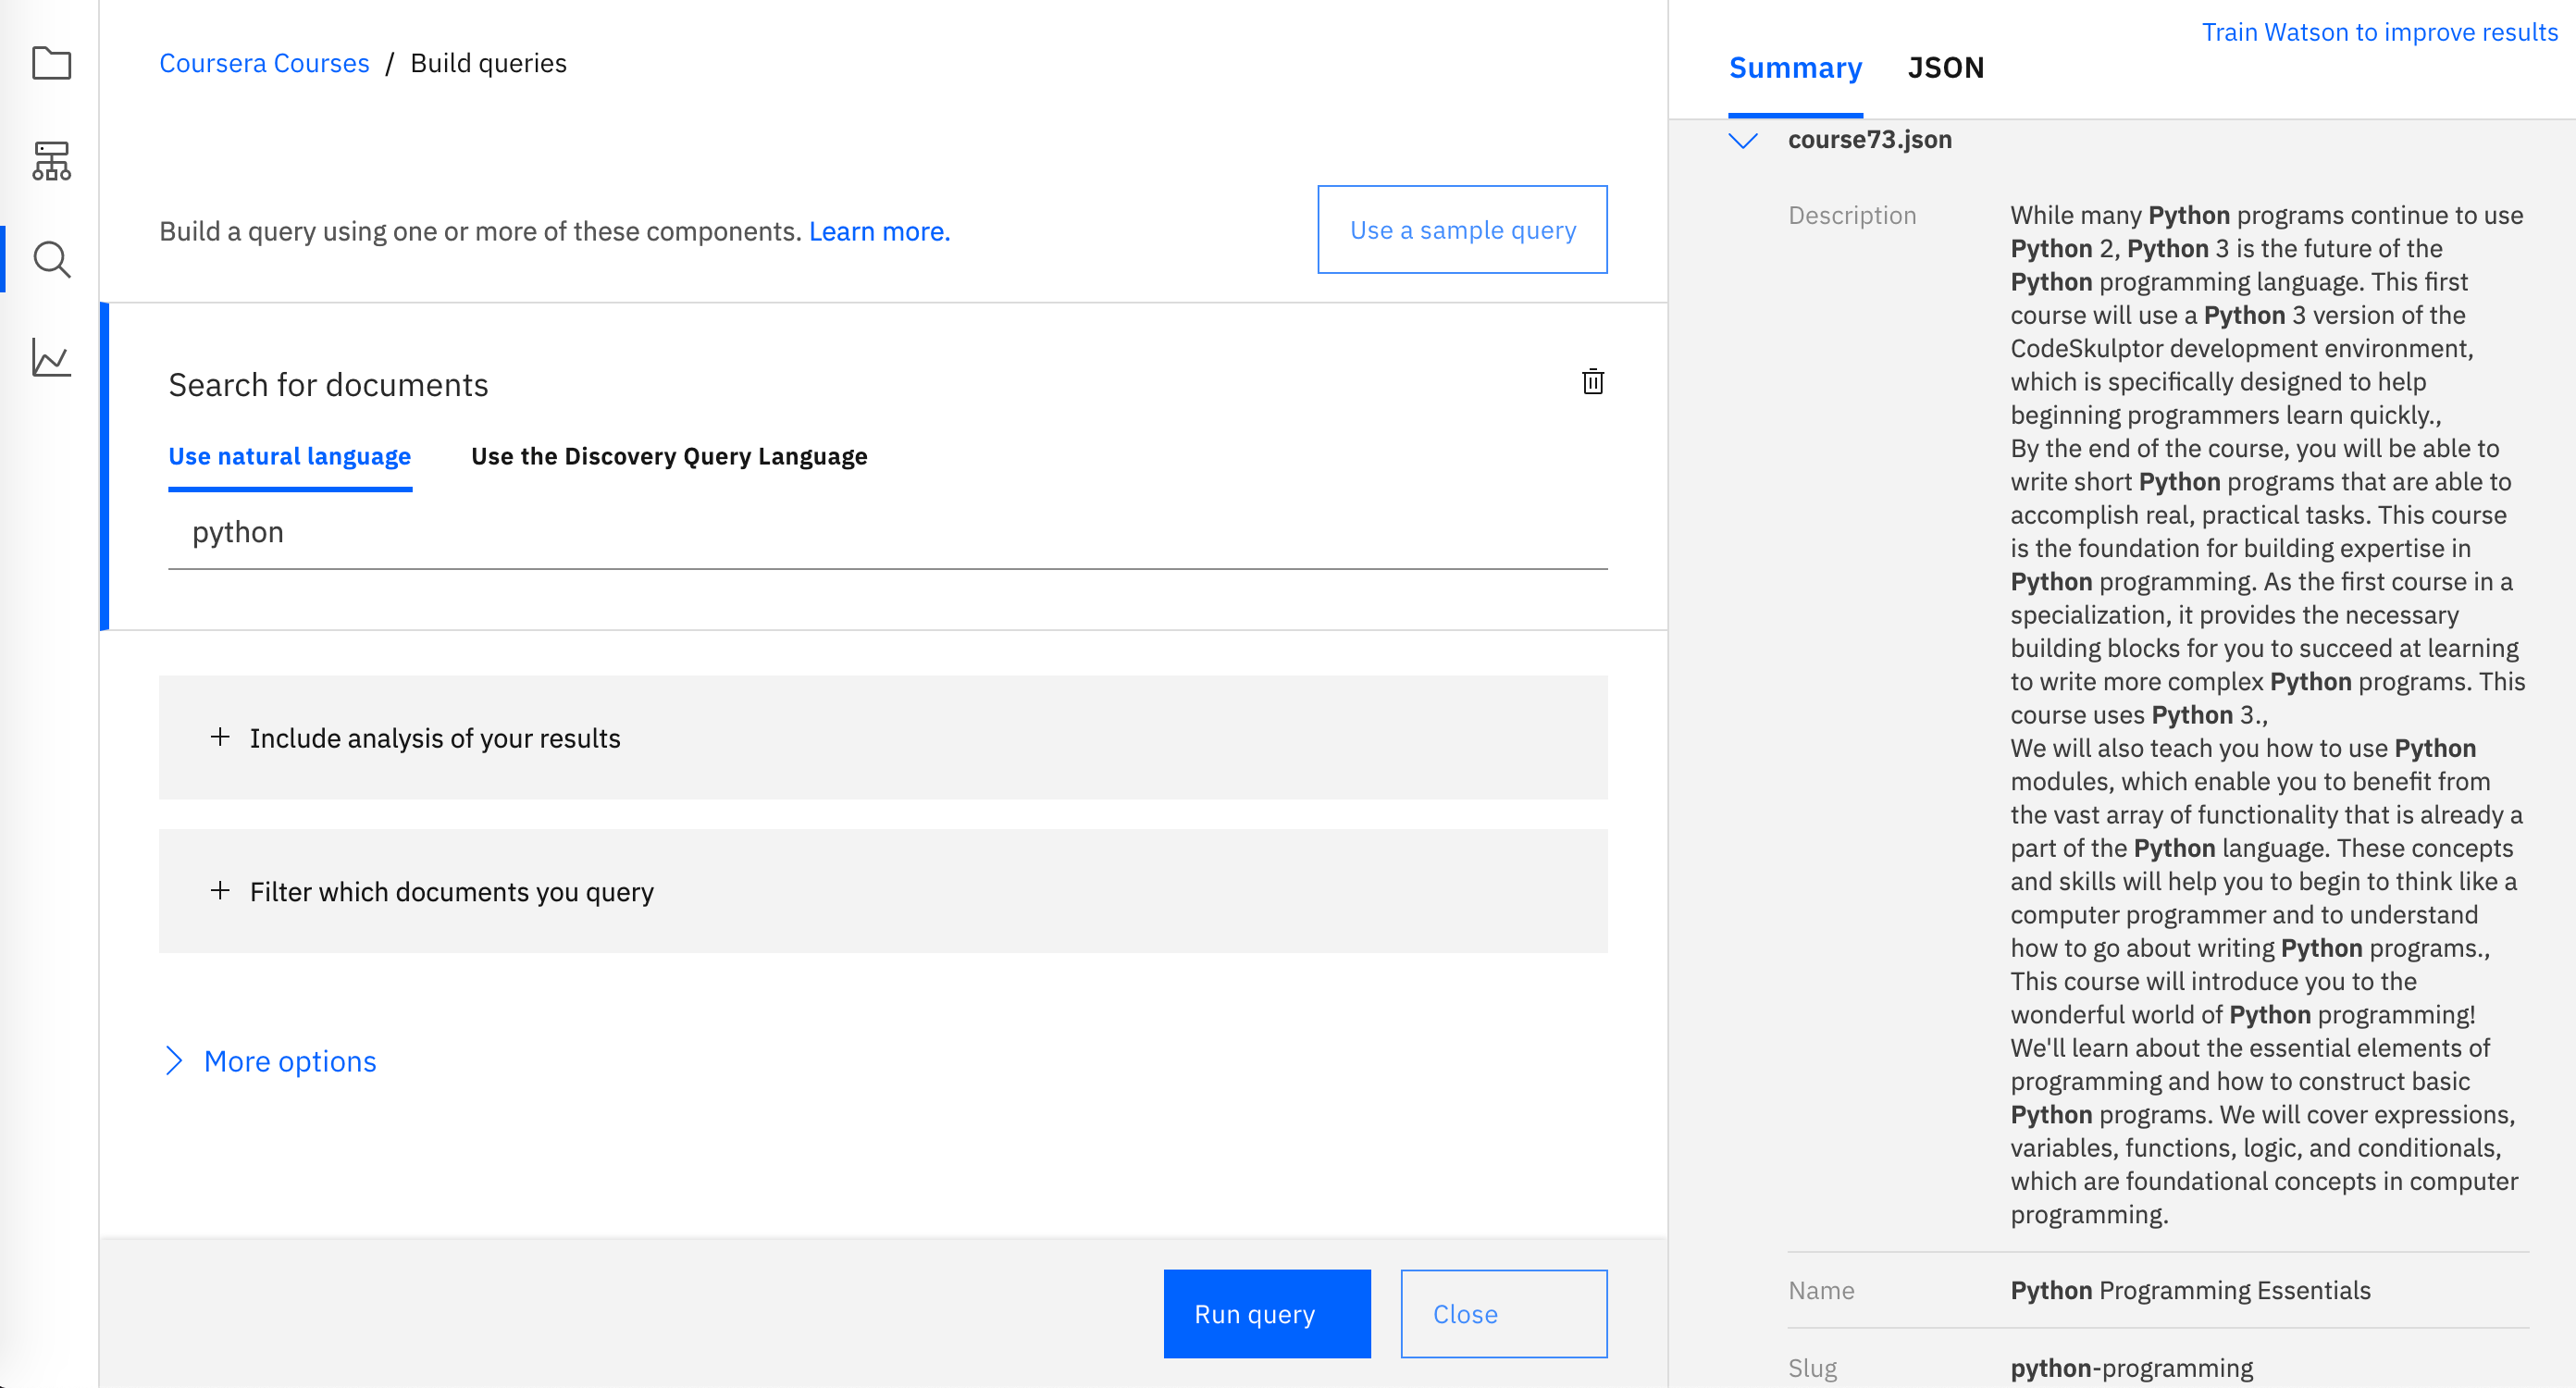
You'll be prompted to enter a natural language query. Try "python" and click Run query. The first 10 results will be displayed in the Summary panel. These are not randomly selected out of the list of matching results. These are ranked based on relevance to the query. In fact, when I ran it, all top 10 results where highly relevant Python courses.
This is just a simple query of course, but Watson Discovery is capable of producing highly relevant results for more elaborate queries as well. And when you need really complex, precise queries in your applications, you can always rely on programming the queries with the Discovery Query Language.
Author(s)
Antonio Cangiano
- public document at doc.anagora.org/week-2-watson-discovery
- video call at meet.jit.si/week-2-watson-discovery